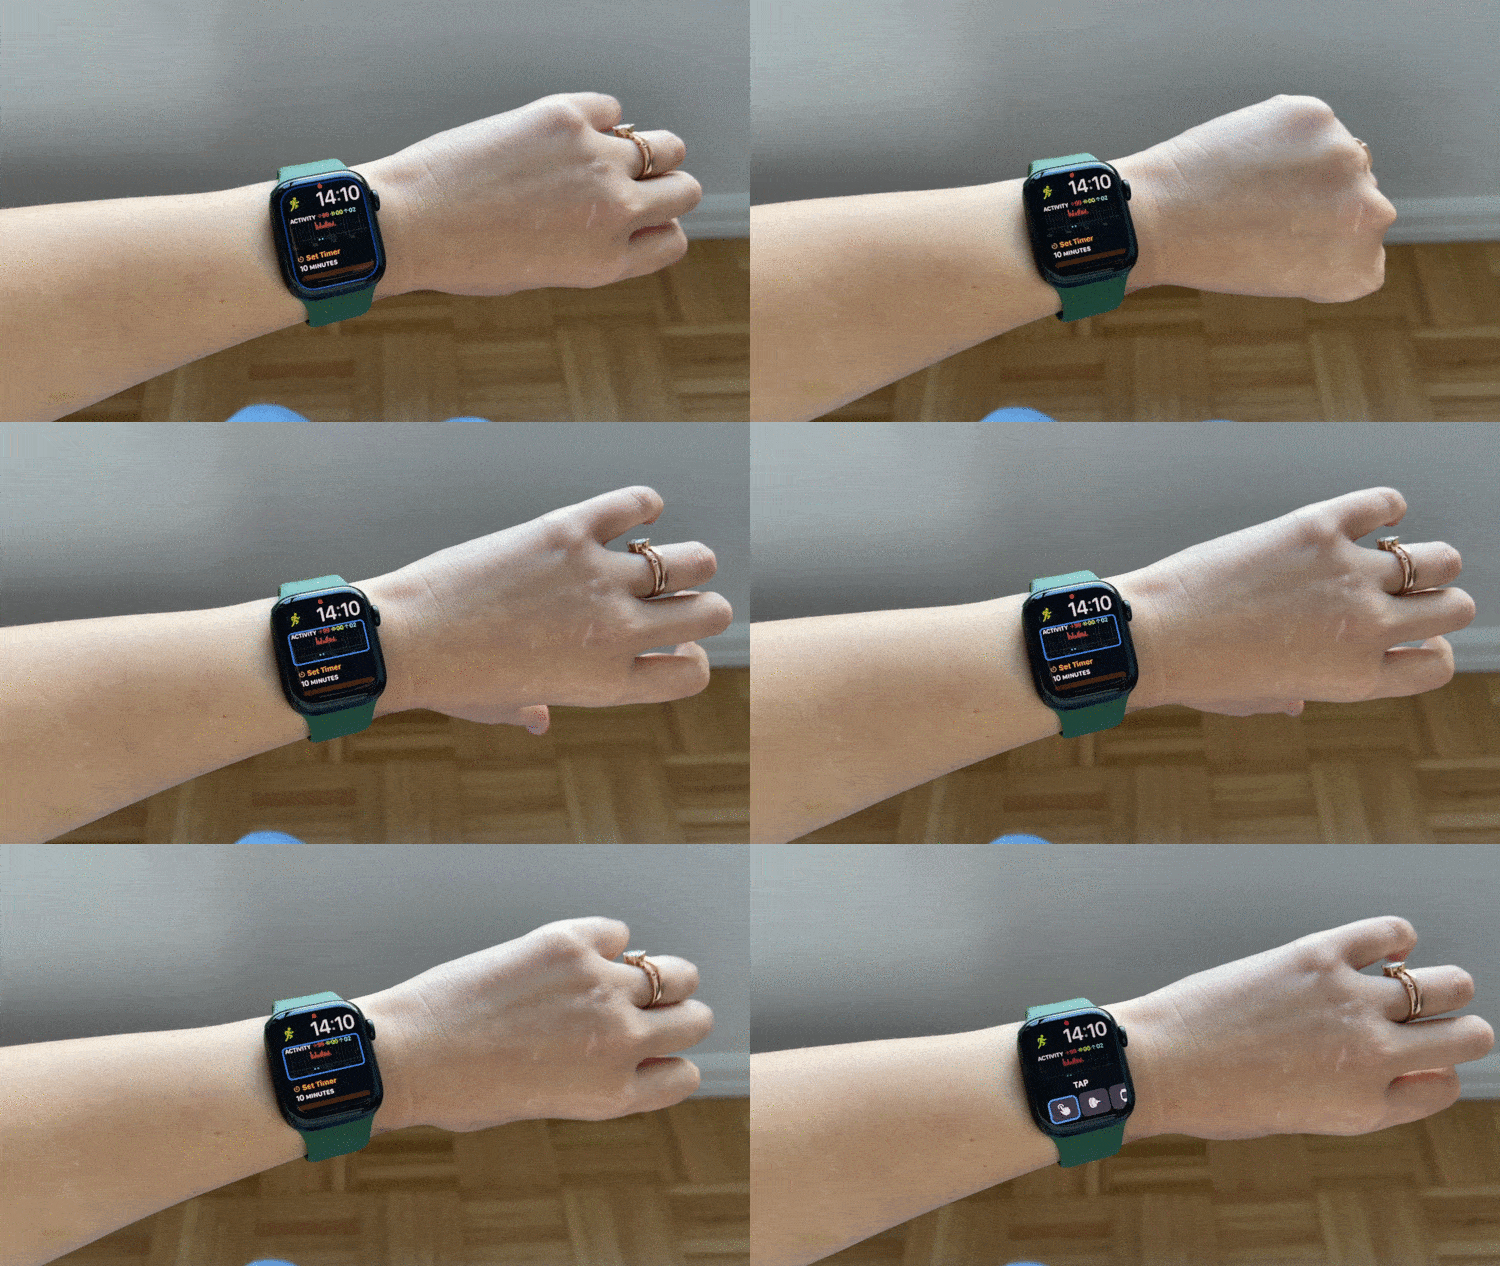
Starting with watchOS 8, Apple introduced a new accessibility feature called Assistive Touch. The cool thing about this feature is that it allows you to control the watch via gestures and your arm movements. Meaning, now you don’t even need to touch the Apple Watch screen to use it.
The tech behind it is pretty neat. Using on-device machine learning, the feature makes use of the watch’s accelerometer, gyroscope, and optical heart rate sensor to read how your muscles and tendons move. The result is that the watch can tell when you’re pinching your fingers or clenching your fists. You can also enable a motion-based cursor that works like a mini-mouse when you tilt your arm.
To be clear, Apple developed Assistive Touch to make the Apple Watch easier to use if you have limited mobility or limb differences. However, it can also be a convenient tool for those moments when you don’t have full use of one or both hands. Maybe you’re whipping up something messy in the kitchen. Maybe it’s freezing out and you really don’t want to peel off your gloves to use the touchscreen. Whatever the scenario, Assistive Touch can help you answer calls, start workouts, access settings, use Apple Pay, activate Siri, and navigate various menus and apps.

First things first — which Apple Watch do you have? Assistive Touch is a new feature, and unfortunately it only works if you have an Apple Watch SE, Series 6, or Series 7. If you’ve got a compatible watch, here’s how to get started.
You can choose to set it up (and then manage it) either on your iPhone or on the Watch itself. There is a minor advantage to the phone as it’s easier to navigate.
On the iPhone:
- In the My Watch tab, scroll down to the Accessibility menu.
- Select Assistive Touch.
- Toggle on Assistive Touch and enable Hand Gestures.
On the Apple Watch:
- Launch the Settings app.
- Scroll down to Accessibility.
- Select Assistive Touch and enable Hand Gestures.
If you choose to set it up on your phone, you’ll be prompted to practice the pinching and clenching gestures directly on the watch. You should take the time to do it, but if you’re in a hurry, you can always hit the Learn More link underneath the Hand Gestures toggle.

Once Assistive Touch is enabled, double clench to activate it. The default gesture settings are as follows: pinch once to go forward, pinch twice to go backward, clench once to tap and clench twice for the Action Menu. The Action Menu is where you select options such as controlling the digital crown, scrolling, Apple Pay, and Siri. As for navigation, you’ll see a highlighted outline indicating what complication, app, or button you’re currently on.
To bring up the motion pointer, double clench twice to bring up the Action Menu. From there, pinch to find the Interaction button. Clench to open the menu, navigate to the motion pointer button and clench again. You should see the cursor from there and then you’ll be able to tilt your arm in various directions to scroll through menus, swipe through screens, and tap buttons. You can also avoid tapping altogether by hovering the cursor over the complication or app you want to select.

I’m not going to lie: there’s a learning curve to using Assistive Touch. I don’t have the best memory when it comes to gesture controls, so I had to practice before I remembered which gesture did what while going about my daily business. There were a lot of times where I accidentally did the wrong gesture and had to start over again. Likewise, I had to really practice with the motion pointer to use it effectively. In general, depending on which method you’re using — gesture controls or the motion pointer — you’ll need a little patience when getting started.
That’s where customization comes in. If you don’t feel like the default settings work for you, you can reprogram them in the Watch app or directly from the wrist.
For example, say you want a quicker way to access the motion pointer. You can reassign double pinch to automatically bring it up. Speaking of which, you can also customize the motion pointer’s sensitivity, activation time, movement tolerance, and hot edges to better suit your needs.
To reprogram gestures, head back to the Hand Gestures menu and tap the one you want to reprogram. From there, you’ll see a list of available actions, menus, or controls.
If at any point you feel like you went a little overboard, you can always go back to square one by tapping “Reset to Default.”

- Turn on Quick Actions in the Hand Gestures menu. For certain apps, this will allow you to double clench to confirm when prompted. If you get a call, for instance, you’ll see a message telling you to double clench to answer.
- Enable Dwell Control in the Motion Pointer menu and select “Shake to start.” This lets you shake your wrist to bring up the cursor. No menu navigation required.
- Try out Auto Scanning. The default is set to manual, but turning this setting on continuously cycles through the available buttons, apps, and complications. This cuts down on how many gestures you need to navigate through menus and screens.
- For better visibility, toggle on High Contrast in the Appearance menu. In the Customize Menu, you can also select Large Menu to increase icon sizes.
- Enable Side Button Confirmation. This lets you use Assistive Touch in lieu of double-clicking the side button for things like Apple Pay.
Photography by Victoria Song / The Verge
"control" - Google News
November 16, 2021 at 10:56PM
https://ift.tt/3kIgf4R
How to use Assistive Touch on the Apple Watch - The Verge
"control" - Google News
https://ift.tt/3bY2j0m
https://ift.tt/2KQD83I
Bagikan Berita Ini


0 Response to "How to use Assistive Touch on the Apple Watch - The Verge"
Post a Comment